
I love boxes! (Perhaps I should start posting pictures of the ones I’ve collected through the years.) I’ve been wracking my brain for a Christmas gift idea for the members of the church choir which I direct. Since the choir is an eclectic group it has to be something suitable for men and women, young and old. I finally saw an idea in a Christian catalog and have tweaked it into something more personal and more “me”. I’m not going to reveal that idea just yet. (Don’t you just hate cliff-hangers?) But I am going to show you the beginning stages. This gift requires lots of boxes. Instead of trying to find and purchase just the right ones, I’ve decided to make my own, each one a unique creation for the unique recipients. I can’t remember where I first learned to do this, and I’m sure you can find it all over the internet, but here’s my rendition. Ready?

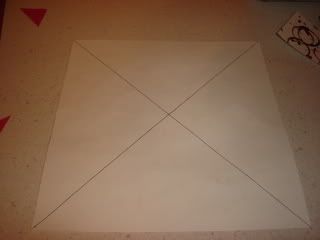
I began with a regular 8 ½ x 11 inch sheet of tag board and decorated it. (My 12 year old daughter is helping me with this.) You can use any kind of paper, any size. (Old Christmas cards work nicely, just make sure you center the picture.) The main thing is to create a square out of whatever you are using. This will be the top, so I’ve trimmed it to an 8 ½ x 8 ½ inch square.

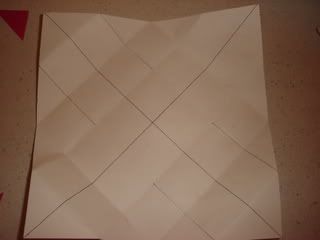
On the back mark an “X” from corner to corner.
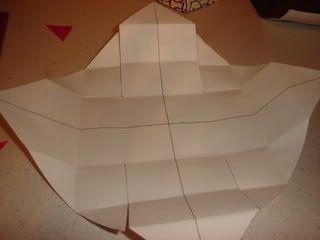
Fold each corner to the center making your folds crisp and clean.
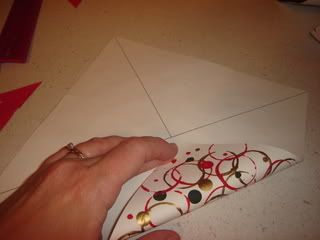
Without unfolding those, fold opposite edges to the center, again making sure your folds are crisp and clean. Unfold those edges and fold in the other edges.
Open the entire square. You should see a lot of creases.
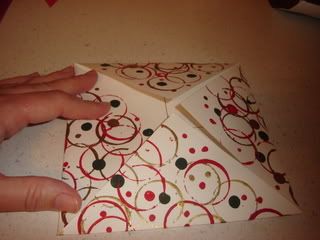
I’ve marked the ones that need to be clipped. (You’ll only do one pair of opposite sides.)

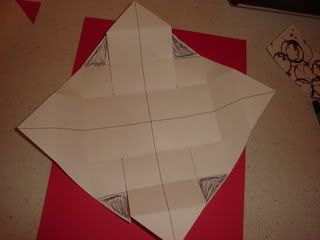
I’ve now shaded four triangles. Cut these off.
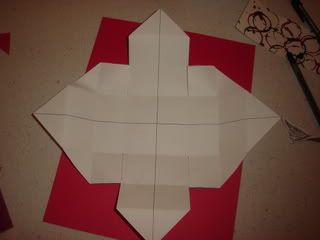
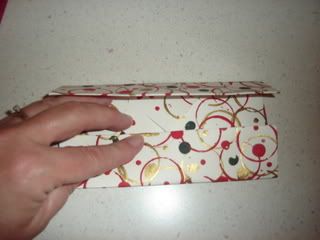
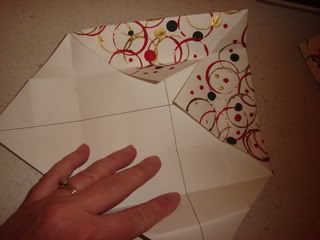
Fold the sides that haven’t been cut into the center like this…


Now fold in the sides that have been cut.
Make sure every thing is square and laying flat and tape the center where the points meet.
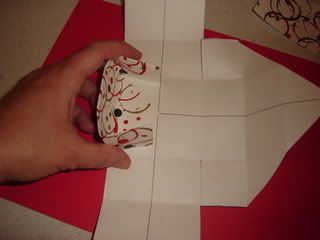
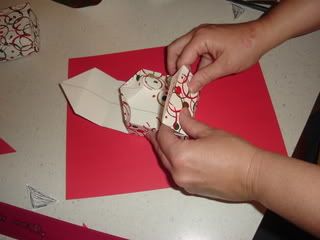
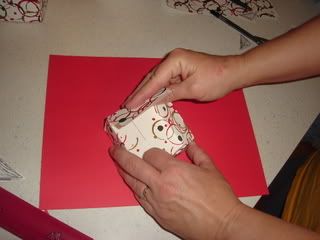
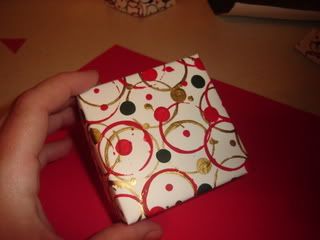
There’s the top of your box! Isn’t it pretty?
There’s the top of your box! Isn’t it pretty?
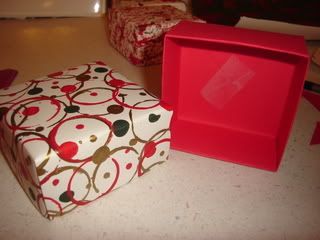
Do the exact same thing for the bottom, only make sure you start with an 8 x 8 inch square instead of 8 ½ x 8 ½ . When your box is finished it will be 3 x 3 x 1 ½ inches.
You can make these in any size using anything you can fold. The possibilities are endless.
Stay tuned for what I plan to do with those boxes. (Insert maniacal laughter.)
Stay tuned for what I plan to do with those boxes. (Insert maniacal laughter.)


2 comments:
those are very cool! my girls can make those, but i cannot wrap my pea brain around all the folding.
My dd's will love making these. Thanks for sharing!
Post a Comment